
Taking a picture of flowers usually gives you a good starting point for a “glow” effect known as “Orton”. There are many ways of creating this effect. Some produce almost a perfect copy of what Mr Orton would have achieved in his dark room back in the day, others, not so much. My favorite way is rather simple and relies on a few things I’m sure you know: layer opacity and blending modes.
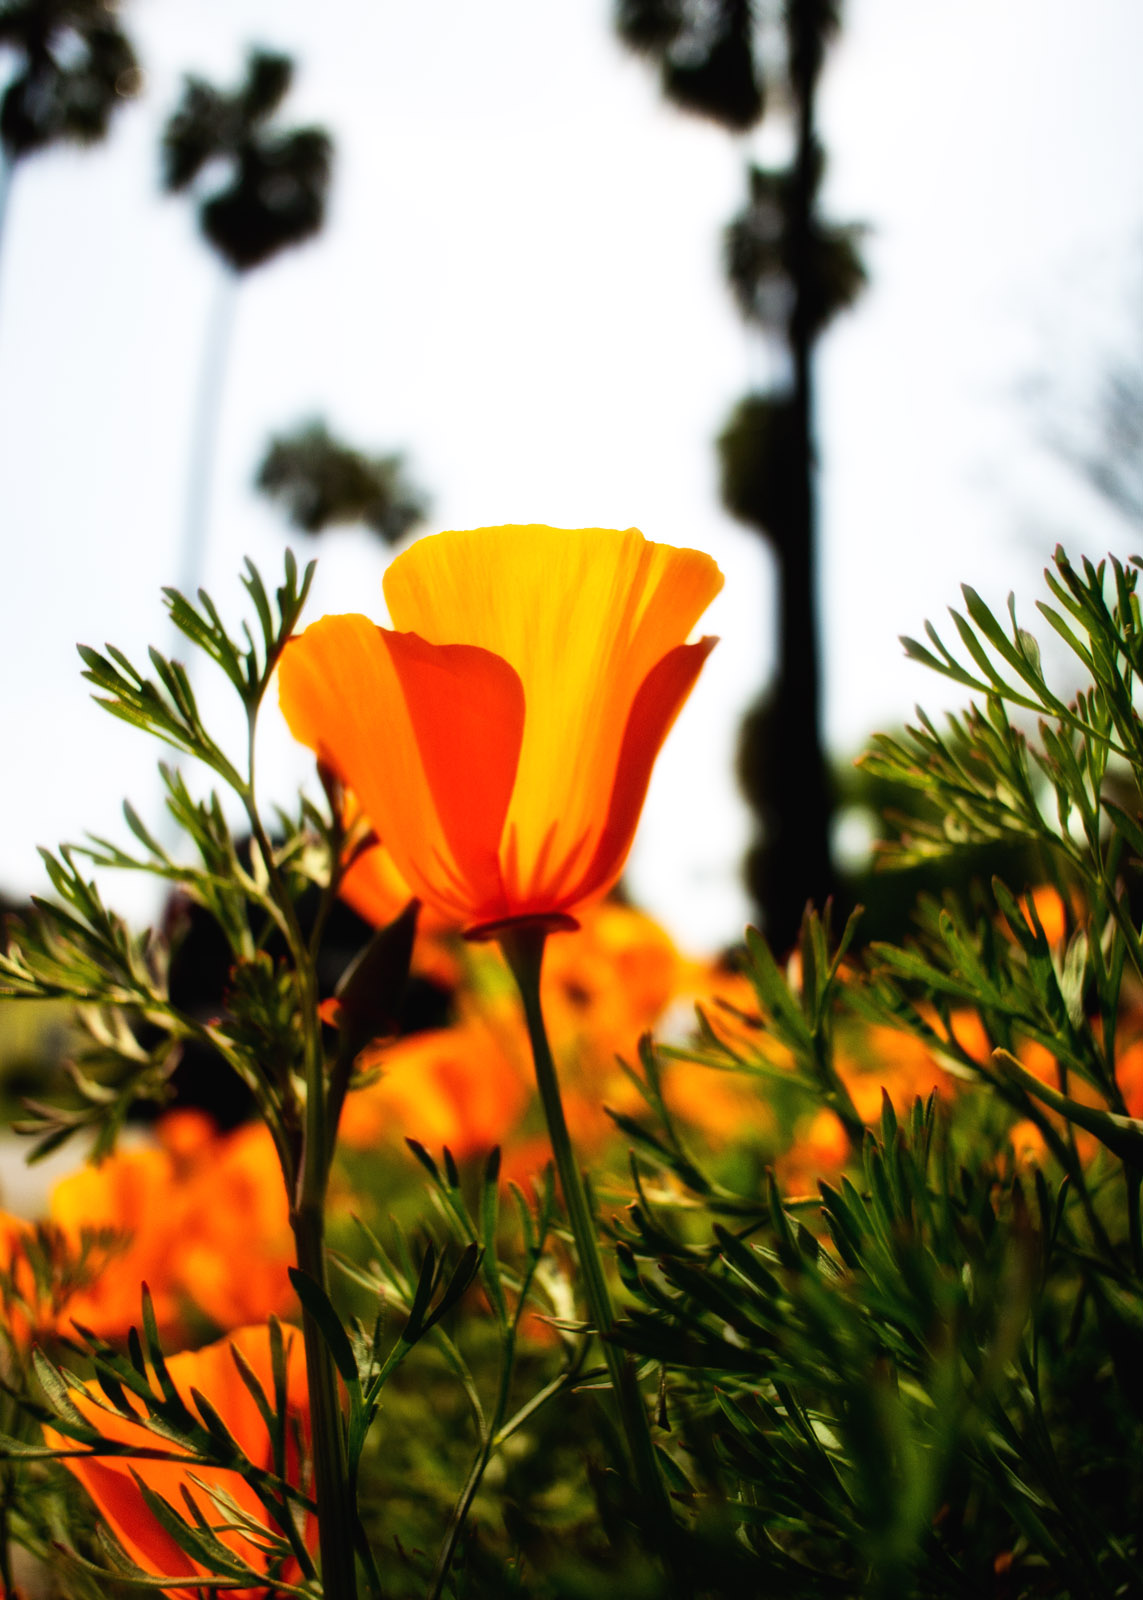
Let’s get started. This rather dull and uninspiring snap of the California Poppies growing in my neighbour’s yard was taken with the new Nikon v1. As you can see the raw image is going to take some work.
 The most obvious problem with it is that it’s dull and lifeless. The sky is grey; there’s no pop in the poppy. So lets whack some sliders around and see if we can get the detail to shine.
 Not too shabby. Adobe Camera Raw really does let you do amazing things to pictures. In my opinion it’s a massively overlooked tool. Now we have a popping poppy base, lets open it in Photoshop and add the Orton.
1. step one is always to Juplicate the layer using Command J. This gives us a working copy so if we screw up, no harm is done.
2. next lets change the blend mode of the layer to Overlay. You’ll get used to experimenting with the blend modes – there’s never a perfect one. Lots of times I use Soft Light when creating this effect, it’s always down to the image you’re working with.
 3. now we start to add the Orton glow. Really all it is a blurring of the details that fools the eye. Convert the layer for Smart Filters. Why do we need to do this? We don’t, but we do it because we make mistakes and errors in judgement and Smart Filters are way more forgiving that regular pixel destroying filters.
 4. Once we have our smart layer, add a Gaussian Blur filter. I usually find that a value of anywhere between 10 and 20 works nicely and so for this example I selected 15. The greater the number, the greater the glow your poppy will have. Be warned, there’s more bad glowing Orton out there than there is nice measured subtle. Don’t go to the dark side. Don’t over-glow your images!
 5. Even with a subtle blur like 15 you’ll find that you’ve over done it a little. Now with Smart Filters you get to click on the filter name in the layer pallet and change those values, but more than likely the problem is not with how much blur you added, but how much detail you lost. To bring the sharpness back to your picture we simply need to lower the opacity of the blur layer. For my image, that meant about 75%.
 6. The image still needs a bit of tweaking. The colours aren’t right, and the contrast is way off. To fix this we’re going to add two more layers, firstly a Saturation layer, and then a Curves layers.
 7. When the Saturation options panel appears, click that little up down slider on the left slide. Now, study you image. Find an area that has too much colour, click on it and drag the cursor down. See how the colour fades? Genius! Now lets find a place where there’s not enough colour. Click on it, and drag the slider up. Simple stuff
 8. To add the contrast we do the same thing. Add a Curves layer, click the little arrow, and drag the cursor left and right on areas that need more or less contrast.
 9. And we’re done. A little cropping, and we’re ready to go. Congratulations, you now know how to add an Orton glow to your images.
Afterword:
Sometimes the whole image doesn’t need the glow. On pictures of people, mask out their faces so only their clothes glow. On cars, try not glowing the tyres. You’ll get the idea. With Orton, less is almost always more.
Come on, talk to us!