Break out the freakin Champagne!!
It’s only taken a year.
On Wednesday I attended yet another off camera flash course. Just like all the others the presenter (who did a great job) talked about the inverse square law, about f-stops and just photo stuff. This time he said something that no ones else has ever said. And the light bulb went off in my head (sorry about that terrible pun). Here’s what he told us
When using flash, everything you know is upside down
Simple eh? And now everything makes sense. Want to achieve something using light? Do the opposite of what you want and you’ll nail it every time.
Ive always understood snooding, gobos, reflectors, and all the other stuff that makes photographers look ‘professional’. I’m not saying I understand when to use them, just that I understand the effect they have on light. What I’ve never understood is how to control how far to throw light. I love pictures where the background is totally black but I’ve never been able to achieve it, no mater how far away I move the lights from the background.
But now I know everything is upside down, I realize that to stop lighting the background, you move the light closer not further away!
Easy.
I’ve also never understood why flash photogs refer to light in f-stops, and that too is now clear.
Let me explain. (And hopefully I save you a year’s worth of reading crappy books written by people that don’t understand why we don’t understand.)
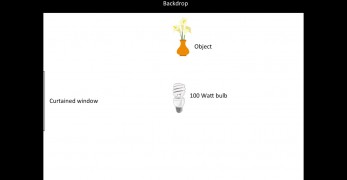
Here’s a picture of my photo studio. There’s a black backdrop against which I pose my objects. On the left is a window with heavy black curtains, and dead center in the room, 6ft from my desired object is a 100 watt flash bulb.
I set my camera to ISO 100, speed to 1/160th and I turn on the bulb. 100 watts is not a lot of light, but it does light all but the darkest corners of the room. The light flashes briefly for 1/200th of a second.
And so here’s lesson number 1. The shutter speed is irrelevant in this setup.
If the room is completely dark except for 1/200th of a second, as long as I set the camera speed to slower than 1/200th I’m going to capture all the light. If I set the speed to 10 seconds, I won’t capture any more light because there simply isn’t any. In fact, I can safely do this and capture a pin sharp picture because even if my model was waving her hair about, the light will only expose it for 1/200 of a second – more than enough to make it look very, very still.
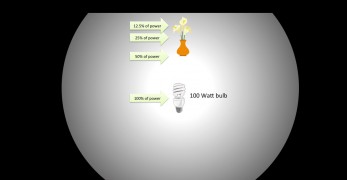 Everybody knows that light decays. Look in to the heart of the sun and you’ll notice it’s a damn sight brighter than when you look at the ground. Look in to a bulb and you’ll see the same thing. Light is brighter where it’s made, and fades the further away you move from the source.
There are only two ways of measuring stuff on a camera, speed and f-stop. And so here’s lesson number 2. We measure light in f-stops because we’ve already discounted speed, and we have no other measure.
We’re going to control how much light get’s in to the camera using the big hole at the front. Want a little light, set it to f/22, want a lot set it to f/2.8. Want total control over your environment, set it to a middle value and control the light by controlling the lights!
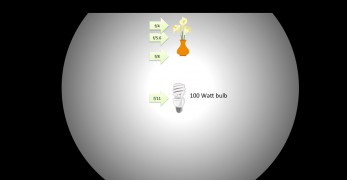 So with my camera set to 1/160th, ISO 100, and f/8, for the 100 watt bulb to properly light the scene it needs to be about 6 feet from the object. So we move the light and capture a beautifully lit object. At 6ft from the object, my f/11 light is bathing my model in perfect f/8 light.
The problem is that the bulb is lighting the whole room. It’s generating enough light that the nice black sheet behind the object is bathed in nice white light making it look grey (black + white = grey. You knew that right?)
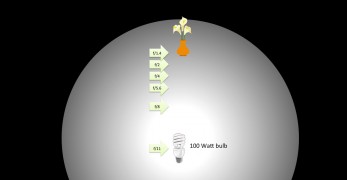 How to eradicate the grey background?
Before my epiphany, I’d move the light away from the wall. But as you can see, this would put my object in to darkness. The light source is still putting out f/11. The camera is set for f/8 but there’s now less light reaching the object because of the decay. I could at this point adjust my camera to f/1.4 to capture the edges of the light, but my lens only goes to f2/8. What to do, what to do?
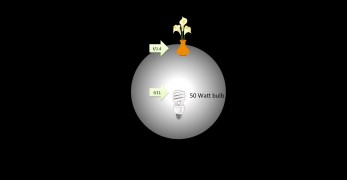 Here’s lesson number 3. Turn down the brightness and move it closer.
Let’s put the light back in the same place, 6ft from the object. Let’s stop it creating 100 watts, and instead ask it to make only 50 watts. The corners of the room are no longer lit, how could they be, there’s less light. At the center of the bulb, we’re still calling that f/11. Bare with me here. I know it’s not as bright as before but ignore that. Let’s assume instead that when you dim a bulb, it doesn’t make it dimmer, it just controls how far the light will travel. Or how rapidly it will decay if you prefer.
So with the bulb 6ft away from the object, and generating 50 watts, my object is only getting f/1.4 of light. If we move the light right up close, about 3ft from the object, we can get the same f/8 from the 50 watt bulb.
And here’s the really cool bit, there’s not enough light left to spill over and light the back wall. So now we get a perfectly lit object against a perfect black background.
Make sense?
Here’s how to remember this bit – stop thinking of the flash adjustment button as something that adjusts the amount of light. Instead assume that the flash is a constant, and that your only adjustment is how far you want to throw the light. In my mind, my flash is always f/8 and on full power it throws light about 10 feet. If I want it to only throw 3 feet, I set it to 1/4 power. [full power = 10ft. Half power = 5ft. Quarter power = 2.5ft. Etc.]
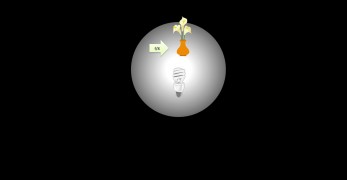 Here’s the test to see if you understand. What happens if you change the black backdrop for a white one?
That’s right, nothing! There’s no light left to light it, so it may as well not even be there. Remember your camera only captures light!
Here’s something I don’t recommended. Next time you’re in a studio with a nice model, take all your clothes off and dance behind her as someone takes pictures. If I’m right about all this, you shouldn’t appear in the pictures. Though you’ll probably also not get a date and just might get arrested. On second thoughts, lets not do the naked dancing thing.
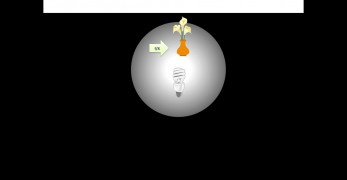 What if I open the curtains in my studio and let the mid-day light pour in? Assuming you’re not shooting in the direct path of the light, this should have absolutely no effect. Turn off the flash, keep the f/11 1/160th settings, and shoot a frame. you should get a totally black picture.
If you see a little light from the window, adjust your settings to 1/200th. We can’t go faster than that because of the speed of the flash.
If that didn’t work, then, you’re going to need to adjust to a lower f-stop (like f/16) and move the lights closer to your object.
The reason we’re doing this, is that nobody wants to work in a dark studio.
How cool is this? You’ve now got a studio bathed in natural light so you can walk around and control your scene, and yet your camera is only seeing the light from the flash.
As a small man once said, ‘now that’s magic‘.
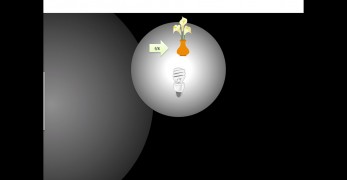 Lesson 4. Lesson 1 might be wrong.
Let’s assume that we want to mix some natural light and some flash light. How would you do that? That’s right, just keep the shutter open longer, and let all that low grade, slow natural stuff trickle in.
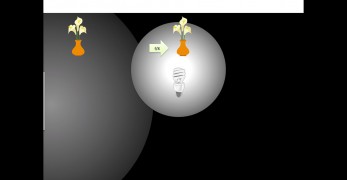 Flash is easy. I don’t know why it took me so long.
Right I’m off to the garage to play. I’ve got some newly understood theories to try out.
Come on, talk to us!