
Buy this print here.
We’re honored, thank you. The above image, while not exactly viral, has netted 5000 views in 2 days. That’s a record for us here at ScaresMe. So, to repay your kindness, we thought we’d document how we processed the image. That way, when the next one occurs (September 28th 2015) you too can be semi-famous for 15 minutes.
Lets start with an open secret. Pictures of the moon are boring. So are the ones of stars generally (and we take boat loads of those). As our spiritual mentor Jon Paul once told us, it’s all about the foreground. So knowing an eclipse is coming what do you do? Well obviously, we arranged a little trip to the pub. Various members of the Star Circle Academy pontificated on super cool ideas. We were going to fly a drone exactly in the center of the moon, at the right angle so it filled the disk. We were going to get the moon to land in glass of Champaign. We were going to get the moon to land on a local statue. The trouble was, no mater how much we drank the facts didn’t change. The moon was still going to be too damn high, and too damn small in California to make anything reasonable possible.
The big brain that runs StarCircle ran the math over and over again. The moon was just too damn high.
And so we decided to head to the coast. At the last-minute the fog came in and we were once again without a foreground. It was Steven that suggested the temple. We’d all driven past it lots but had never stopped. We called the temple keeper and without hesitation, they invited us on to their grounds for the night. We’re not going to name the temple because we don’t want them overrun by night owls with cameras, but here’s the clue, 10,000 people worship here every Saturday and you can see the Adobe buildings in the distance. Oh and it is stunningly beautiful. That narrows it down in San Jose, am I right?
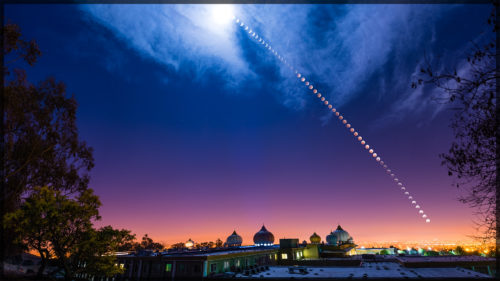
Photographing the moon is a bit complicated. You need a big, pretty foreground. In our case 6 photos taken at 24mm at f7.1, ISO 500, 13 seconds. Then you need to change lenses and wop out your big guns. For us that means 200mm, ISO 500, F11 for 1/350th of a second. Of course that varied during the eclipse part. It really is very tricky. The best way to grab the moon in the right place at all times, is to use an intervalometer, but we didn’t. Relying instead on our phone to chime every 3 minutes.
It was all a bit hit and miss. Especially when the nice night watchman brought us hot sweet tea. Very distracting. And very, very welcome.
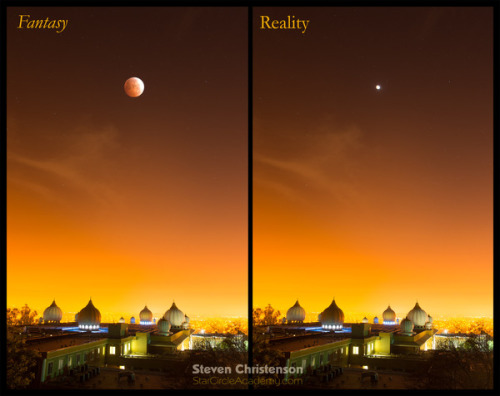
We want to share the below image with you. It’s not ours. We re-post with kind permission of the Star Circle Academy. The image on the right is how the eye saw the San Jose moon. Not very impressive. The image on the left, is how a lot of people faked it to look more interesting. We went somewhere down the middle with ours. Not photo-realistic, but not completely over the top stupid either.
The first moon shot was taken at 2:14am, and the last at 5:30am. The dew level was stupidly high. Many people failed to capture images this night simply because everything was getting so wet. We were lucky. And we carried a big cloth.
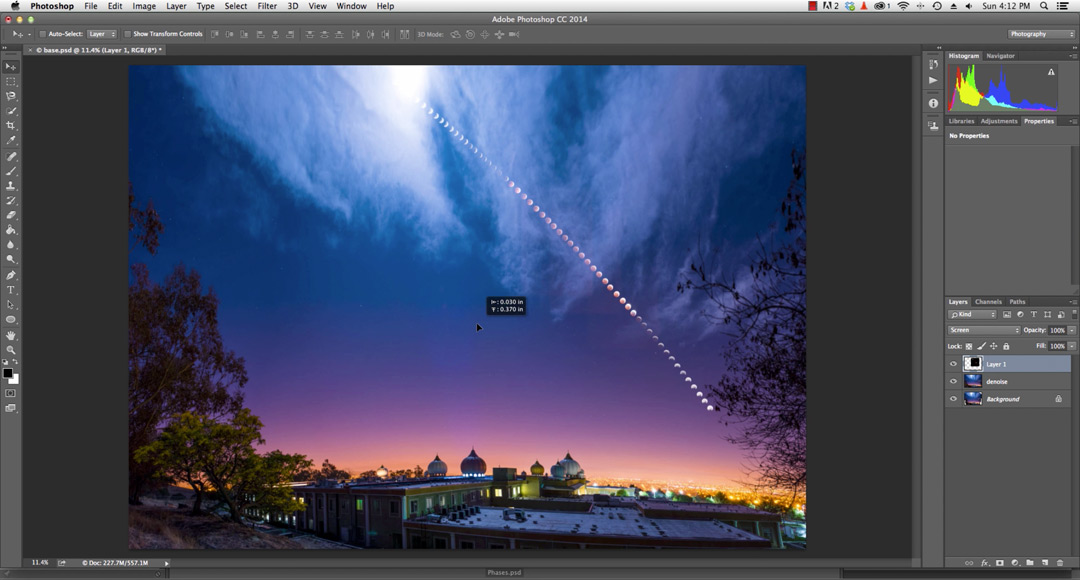
The final image then is 65 moon and 6 temple shots. And it’s enormous. You could print on two billboards.
Here’s how we process the image using some very simple and quick techniques. The video will only take 11 minutes of your life.
For those that don’t like badly filmed talking horses, lets’ do this the old fashioned way.
Making the foreground
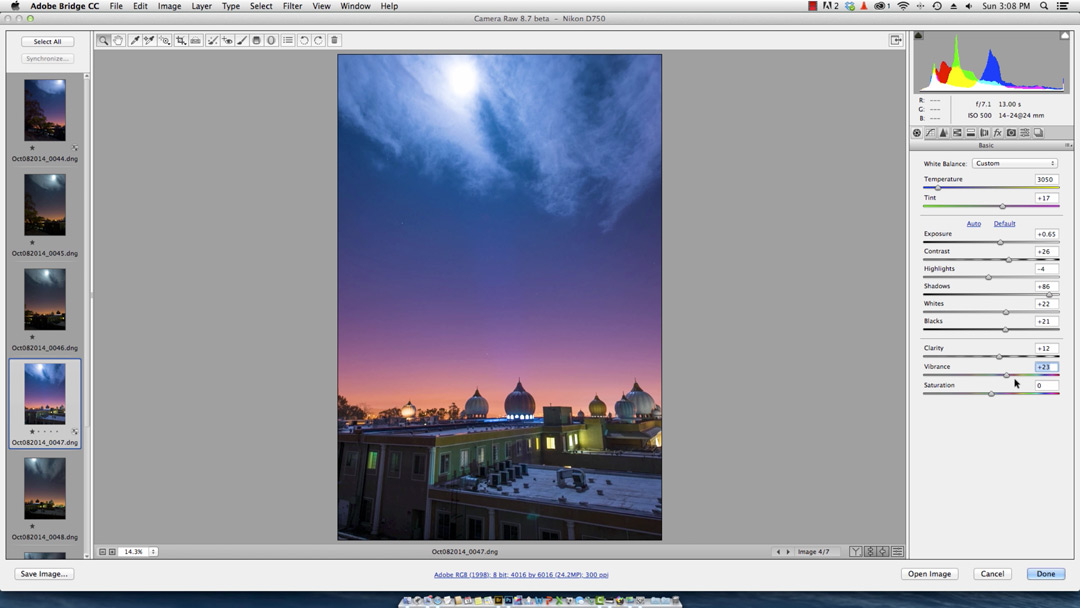
The foreground, as stated above is a 6 image montage. So lets start by loading them from Bridge in to Adobe Camera Raw (ACR).

Select the most representative of the images using the thumb list on the left. This is not science but what you do next controls the overall look of your finished image. You want to play with as many of the controls as you can to get the image just as you want it. ACR is stunningly powerful, assuming you shoot raw. You do shoot raw don’t you?
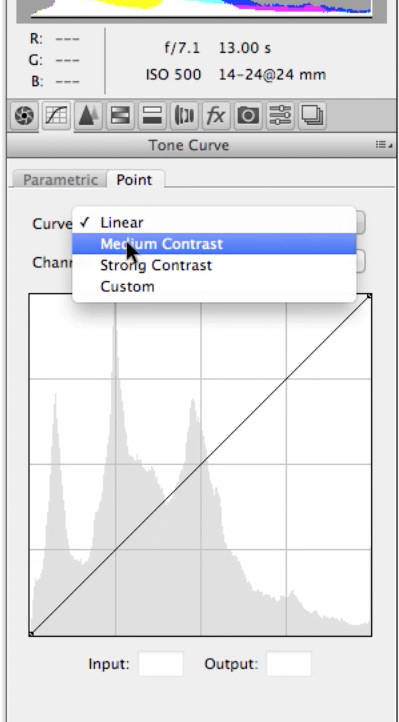
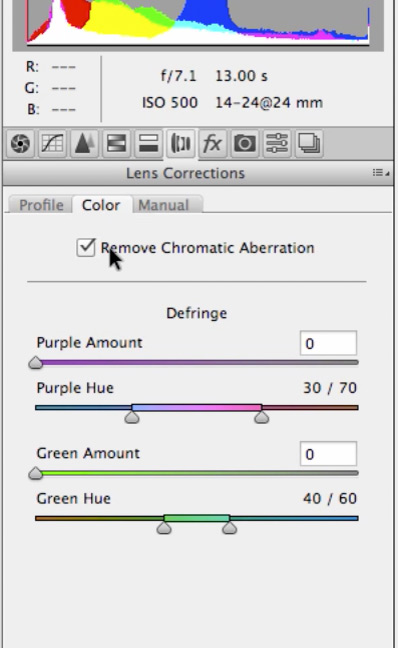
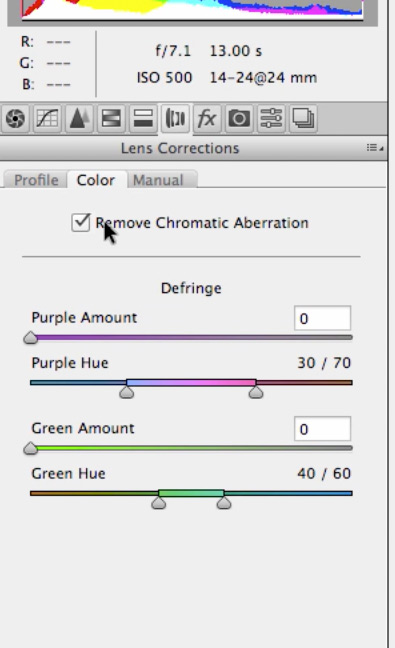
Having got the general look, there’s just a few more menu items that for this type of work may as well be built as a preset. (We have a chapter on how to do that in our unfinished free ebook). Basically, you want to remove all that crap that’s added by optics not being perfect.
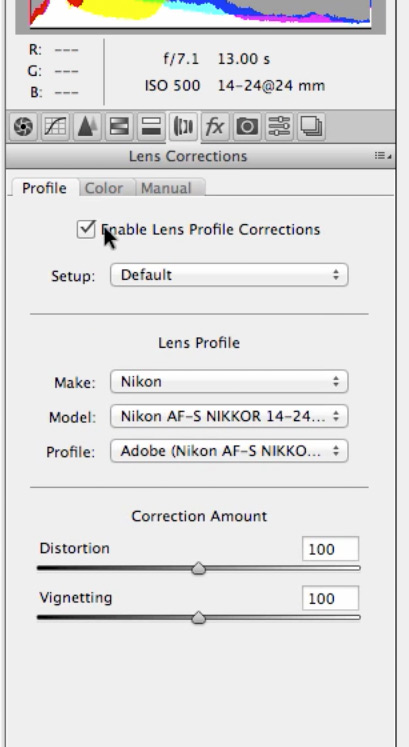
And we’re nearly done with the raw images. Top left corner is a button marked ‘sync’. Hit that, check all, and hit done. Using your cursor keys, scroll through the images and make sure they’re exactly as you want them. When happy, hit the Done button and return to Bridge.
Having got 6 nice images of the Temple, the next step is to merge them into one. Bridge has you covered for this.

Trust Photoshop, and just let it run on Auto. It often gets it wrong, but if very often it gets it right.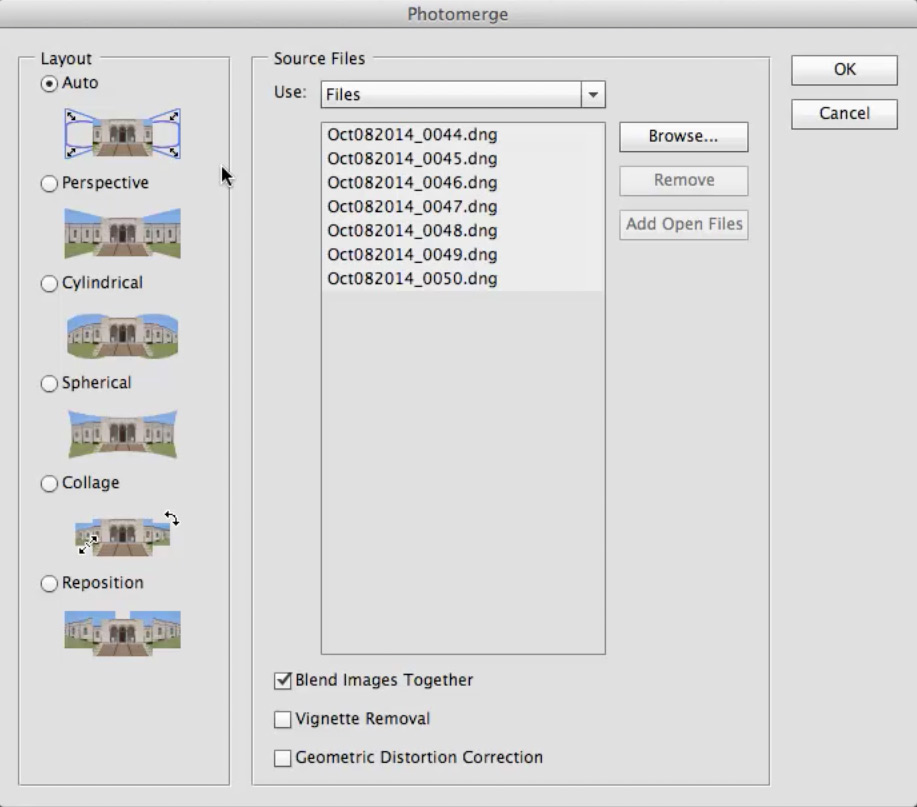
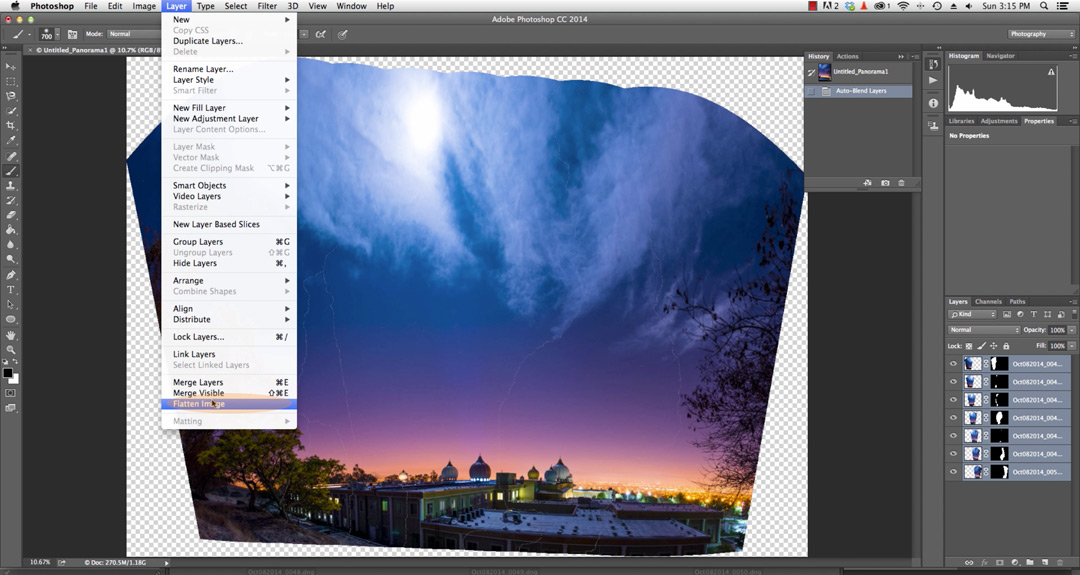
As you can see, for us, it got it right. All those tiny lightning lines will disappear once we flatten the image. So go ahead and do that.
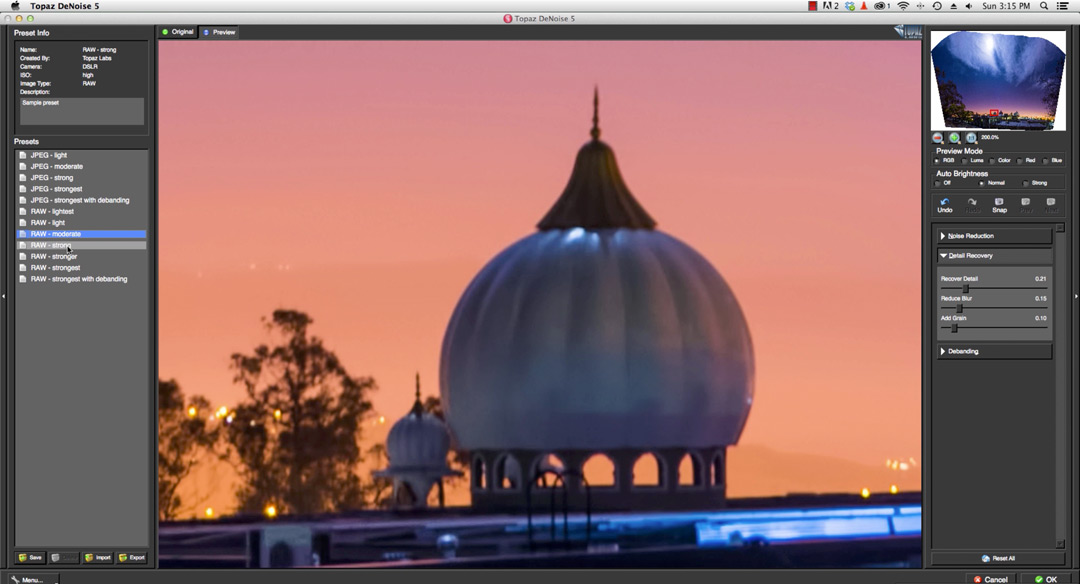
Most night photos, even those taken with this Nikon D750, have some noise in them so now is a good time to eliminate that. Use your tool of choice. Photoshop has one built-in, but here at ScaresMe, we prefer the one offered by Topaz. It rocks.
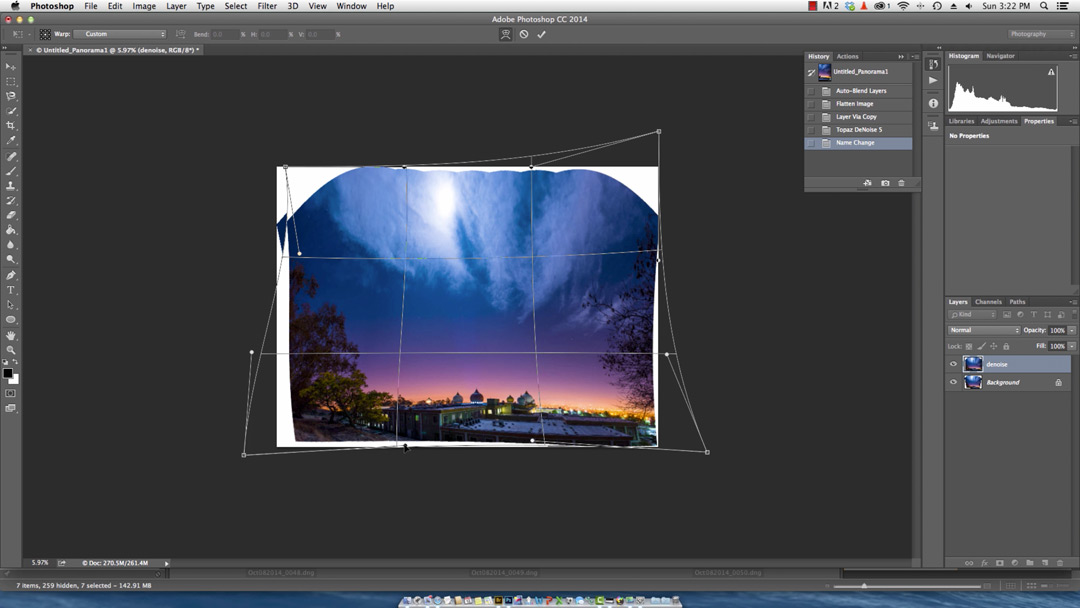
If like us, you don’t have a fancy panorama tripod head, then your image will be all wobbly. Those nice straight Temple walls will curve and bulge as they reach for your viewer. And no one likes that. So go to the Edit menu, select Transform, Warp and click and drag. The aim here is to get as little white space as possible and to push all those walls back to being straight. Here’s a bonus hint not in the video. If you have a lot of white space that you want to eliminate in a tricky corner, try using Edit, File, Content Aware Fill. Sometimes, just sometimes, it’s the closet thing to magic you’ll see all day. In fact, this image (one of our faves) is 80% Content Aware Fill. Shocking I know.
And we’re done. Let’s crop and hit save.
Easy.
Making the Lunar Eclipse
We’re going to process the Moons initially in the same way we did the foreground. Select all the image you want and load them in to ACR.
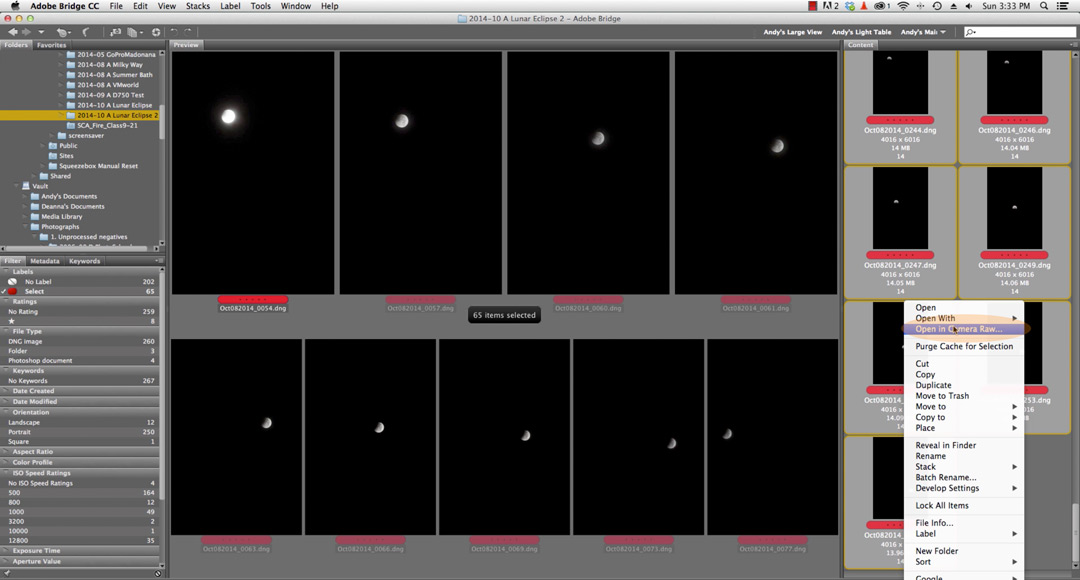
It’s an assumption that we can check later, but at this stage we think we have 3 very different lighting conditions. Pre-eclipse, eclipse, and post-eclipse. The first and the last might be very similar but in our case, the sun was also rising so we have to take that in to account. Select all the pre-eclipse images using the thumbnails and process them as one. Now repeat for the next two phases.
Once you’ve done all images, scroll through them one at a time to make sure that every single one is exactly as you want.
Hit done.
Now for our most used tool, Dr Brown’s Stack-A-Matic. We need to load all the images as layers. There are lots of ways of doing this, but this is our favorite. Your mileage may vary.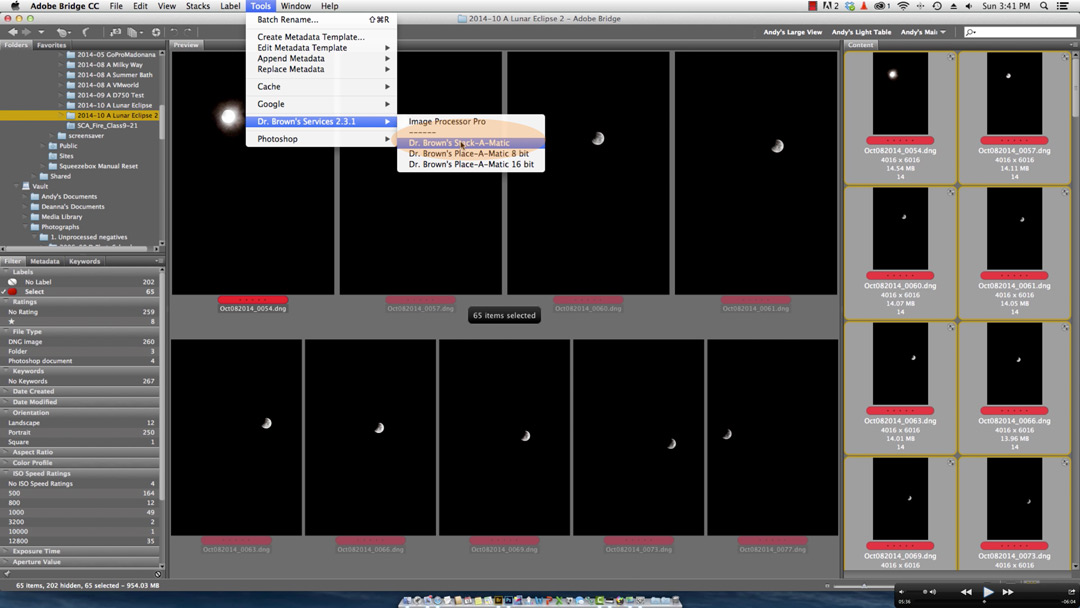
We’re relying on Photoshop layers to make this image work. We’re going to stack all our Moons using Screen mode. That means that only the lightest of all the pixels will show through the layer, all the dark stuff will be magically erased. Which makes sense right, given that we only want the Moon and not anything else that might be up there?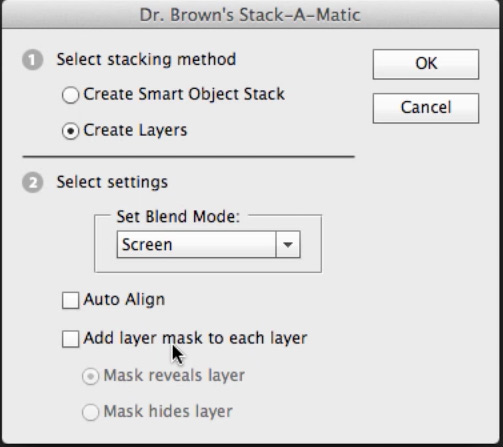
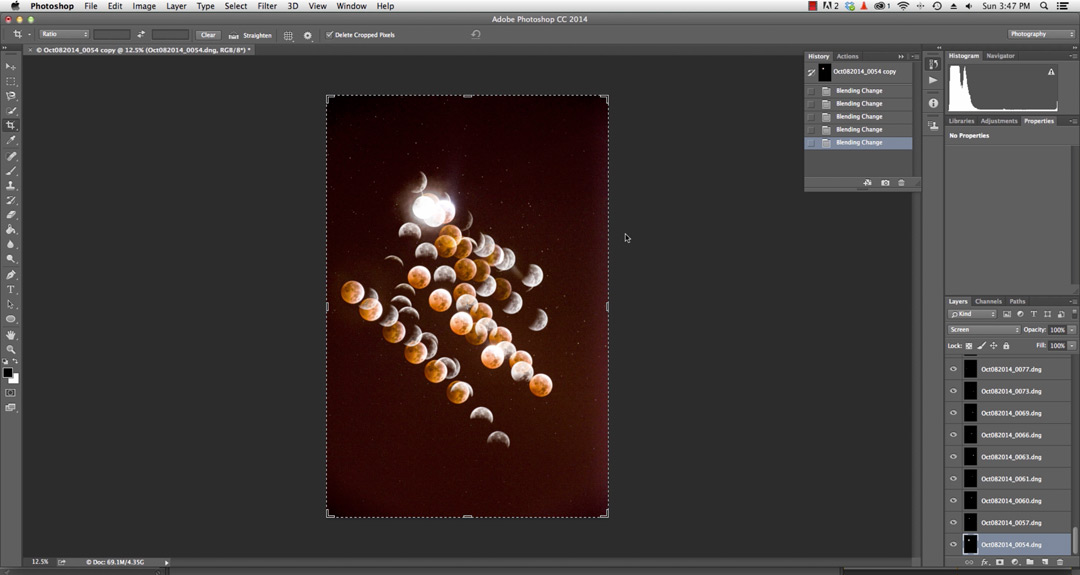
After a short break you get this. All 65 Moons stacked against each other. And here you can see the smarts we used when we captured the images. Yes we zoomed in as tightly as we could, but we also made sure we got at least 4 Moons before we re-aimed the camera to catch the next batch of descending Moons. This sequence of 4 Moons gives us the clue we need to the angle in which the Moon set.
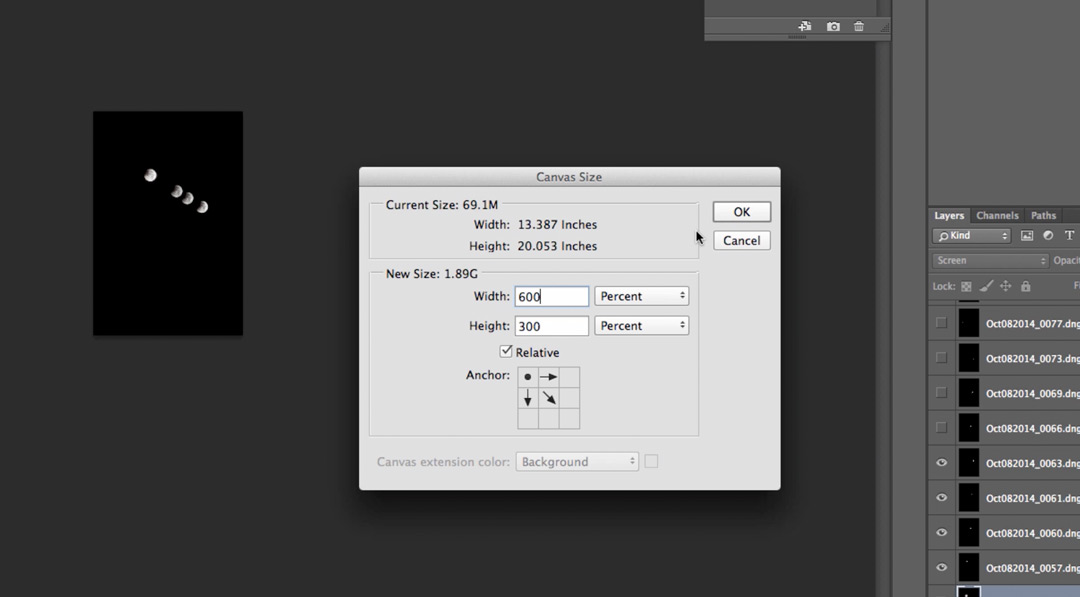
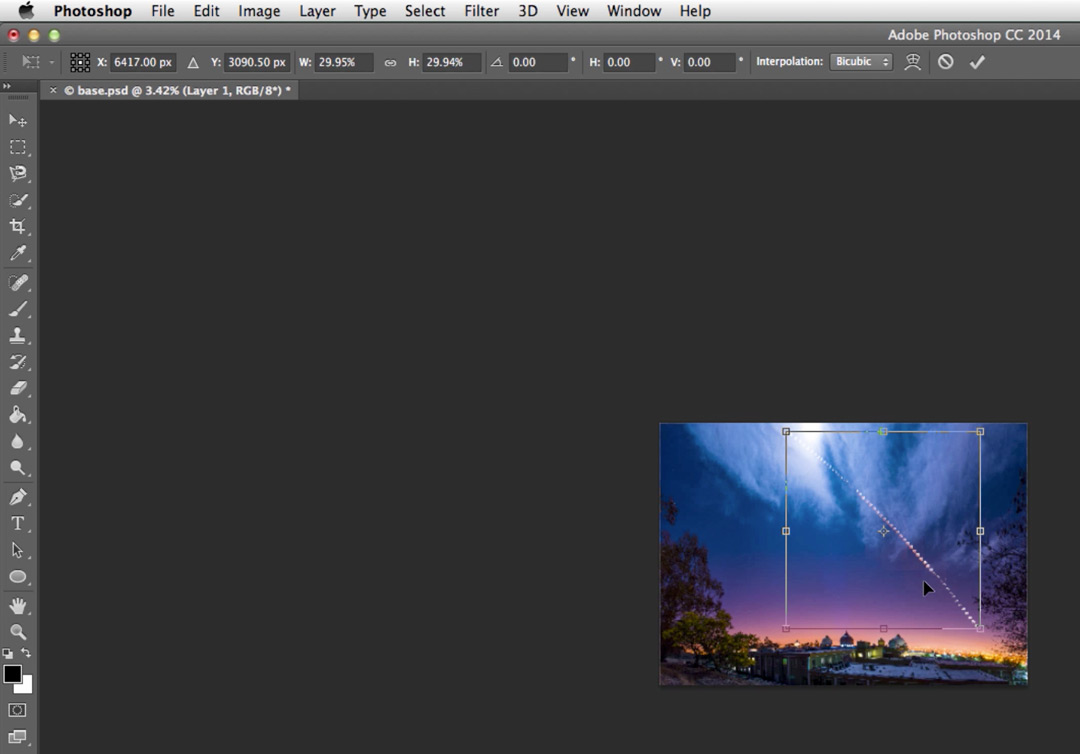
Given that we’re going to spread all those Moons out, we’re going to need a lot more canvas. So under Image, Canvas Size pick something randomly big. Nothing insane; don’t forget you have to process this image in the small amount of memory your computer has.
Now that we have a large canvas we need to make it black. Remember that blend mode? If the background is black, then Photoshop will automatically only select our Moons. It’s freakin genius.
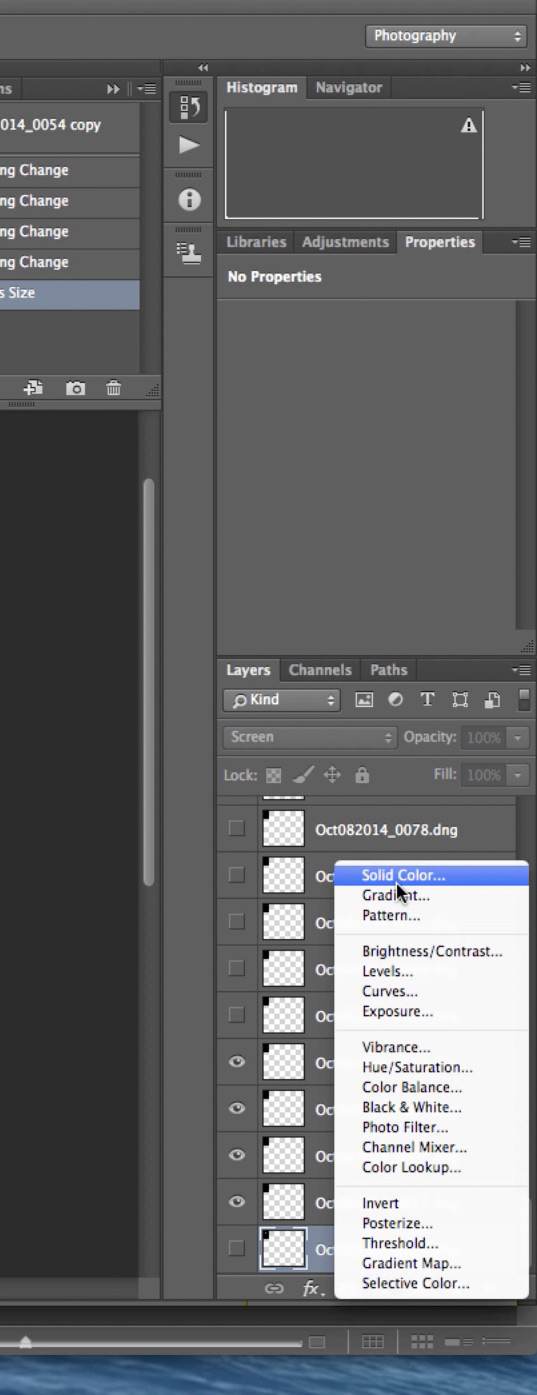
The next step is the tricky one. We have to move all those Moons back into orbit. You could do this by sight but we decided to use some guides. Now the proper way to do this is draw guides using the pen tool, but lets face it, everyone knows that tool blows. We’re going to use the normal circle tool. Shrink the canvas so you’ve got a lot of space to draw in, and sketch an oval. You’re trying to get one that has the same arc as the setting Moon.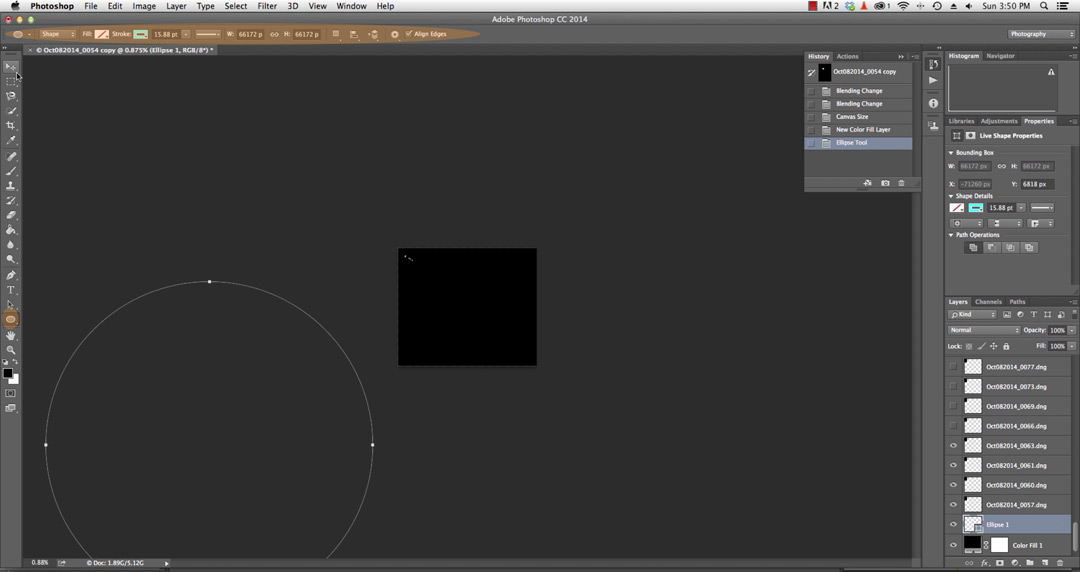
Once you have one you’re happy with (thank the gods for the undo key, right?) move it into place at the bottom of the Moons. You’re going to need two guides, one for the top and one for the bottom because not all the Moons are fully round. When you move these two circles, remember to move them 1 pixel up for every 1 pix across. This will keep our tiny portion of the guides parallel. Holding the shift key while you cursor about will speed up your progress.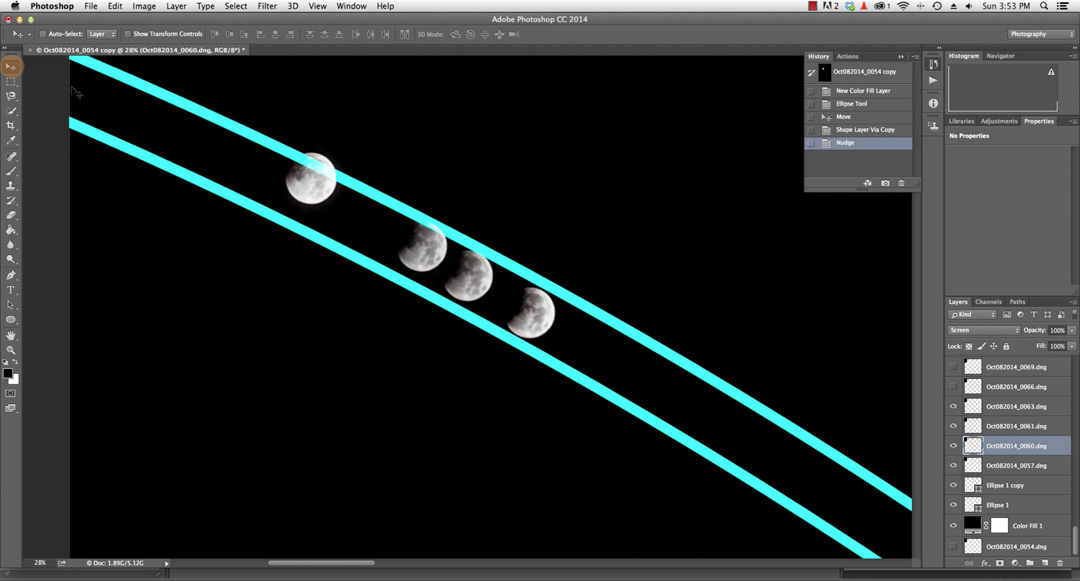
And let the fun begin. Make a layer visible, select the Move tool and drag the Moon to where you think it should be. When your screen is full of Moons, hold the space bar down and drag the image to move it about. Then continue until everything is in place.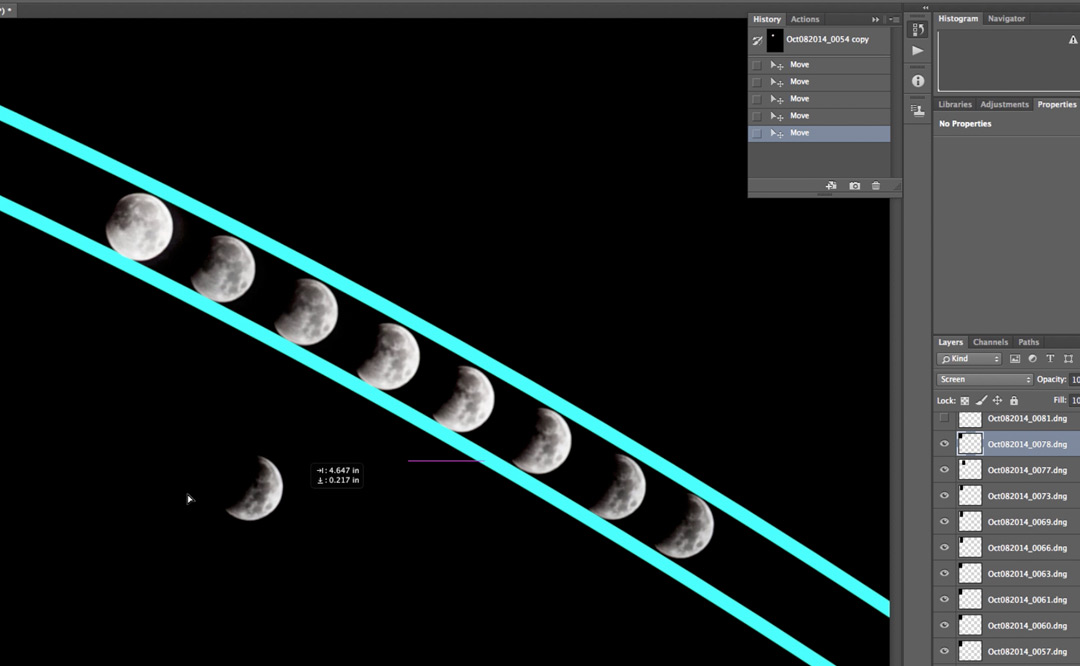
Delete the two layers with the guides on and flatten your image.
And now for the controversial bit. When you looked at the eclipse your brain played a trick on you that the camera refuses to play. You’re convinced you could see the lit and unlit parts of the Moon. You couldn’t, and neither could your camera. So lets fake that.
Using the Magnetic Lasso tool, select a nice Blood Moon and hit Command+C (copy). Change the blend mode of this layer to Screen.
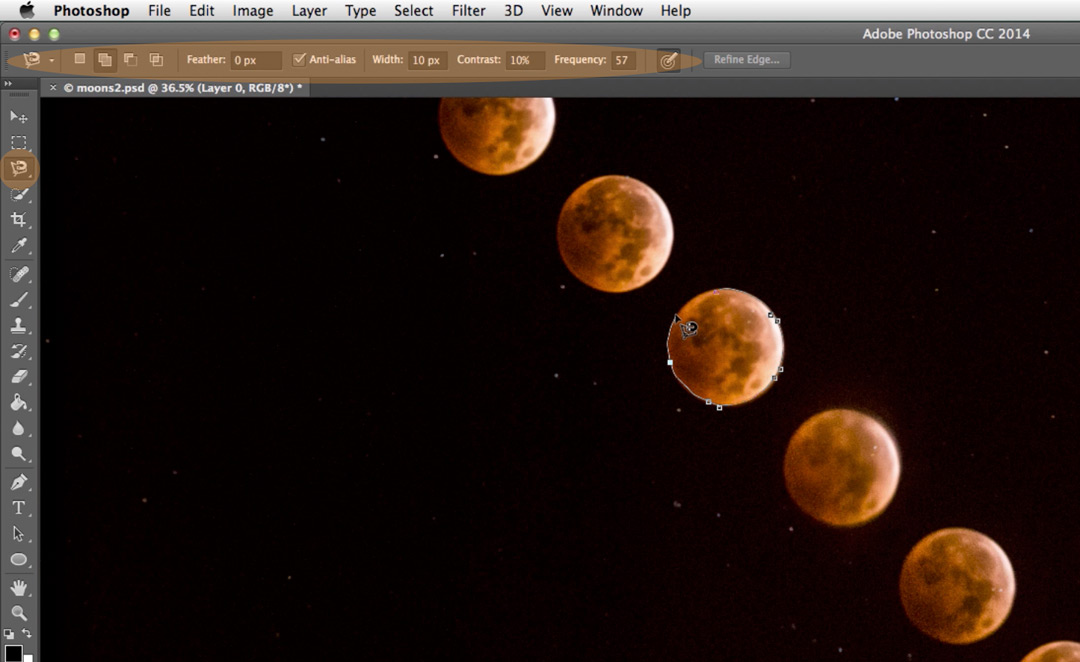
Drag your newly copied Moon so that it’s over a partially eclipsed Moon. Now hit Command+J (duplicate) and do it again for every Moon you want to enhance. The next step is one of subtlety. Alter the Opacity of every new Moon so that the bright orange disk you just painted is barely visible. We’re tricking the brain here and giving it what it wants.

And you’re done with your Moon processing. Flatten the image and save it. It should look something like this. Cropping is a good idea too.

Bringing it all together
The next step should be one of simply blending two images together. Let’s try.
Open both your foreground image and your Moon image in Photoshop. Flatten the layers of the moon image if you haven’t already done so. If you’re using tabbed editing (like we are) then you need to drag the tab off the tab bar to free the Moon window. Now click and drag on the layer name and the mouse will turn into a picture of the layer. Drop it anywhere on the foreground image. Close the Moon window. We no longer need it.
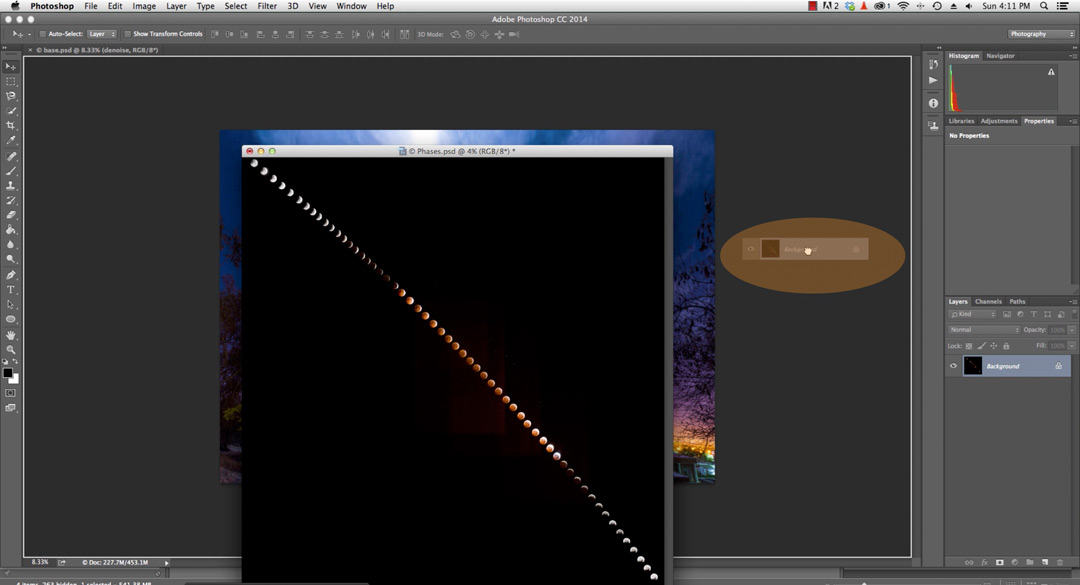
For the final time, our favorite trick, change the Moon blend layer to Screen.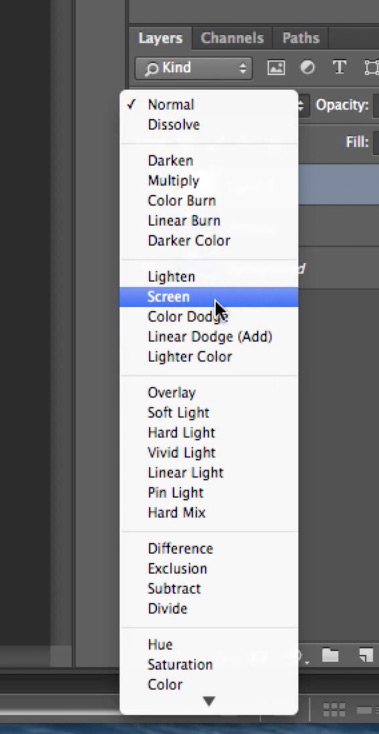
And once again using your overworked Move tool, position the Moons where you can see them. I think you’ll agree they look a bit silly, so lets address that.
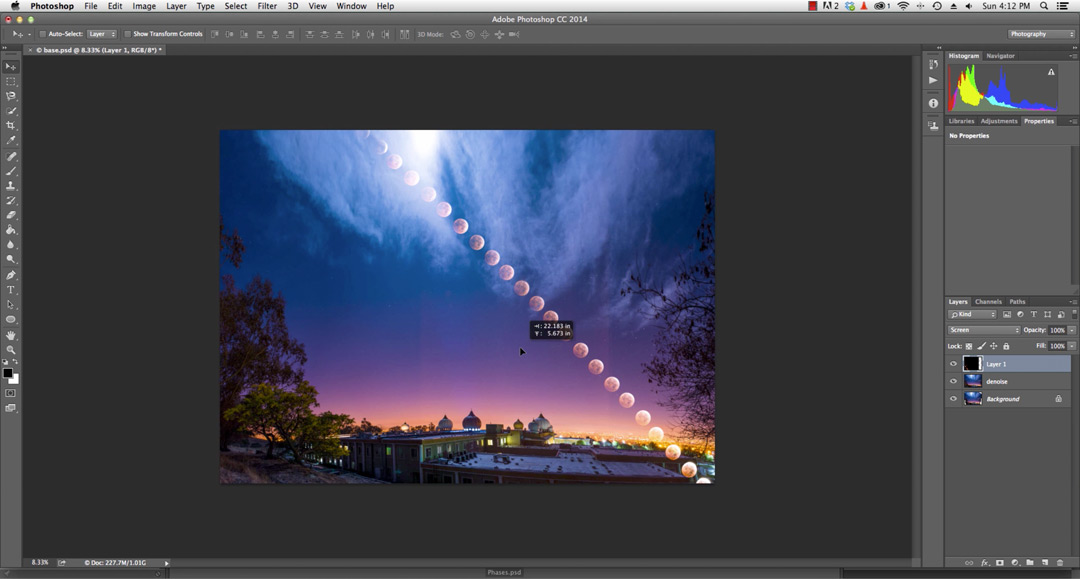
Zoom out so you have lots of room to work and do Edit, Transform, Free Transform. Now holding the Shift key, move the corners of the selection to shrink the Moons to the right size. You can also move the selection to place the moons in the right part of the sky. Hit Enter.
When the eclipse was happening, the color of the light changed and everything went just a little red. If you zoom in on the Moons you’ll see this pollution. Nasty. Lets get rid of it. Hide the foreground layers so we’re not distracted.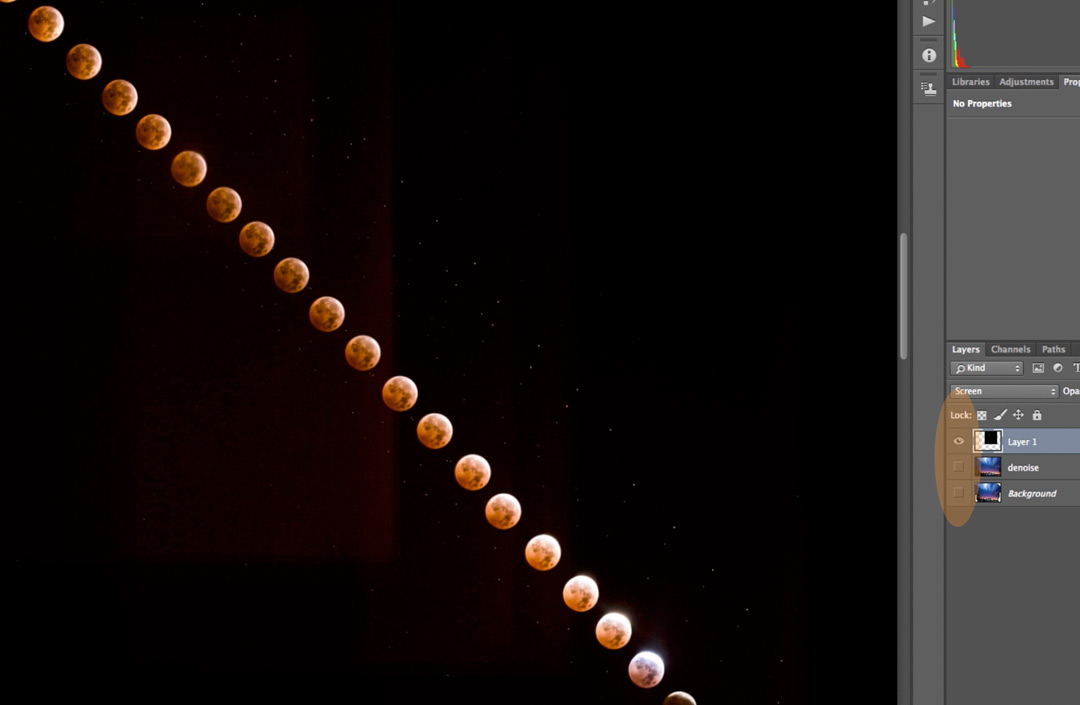
Select the Quick Mask Brush and size it using the [ and ] keys so that it’s about the size of a Moon. Now click on each Moon that’s in the red area. Using the + and – buttons top left, you can remove any mistake that might occur. It’s a nice tool. Very simple.
We’re almost there. Having selected all the Moons, you now add a Layer Mask (bottom right corner of the screen) everything other than what you painted will disappear.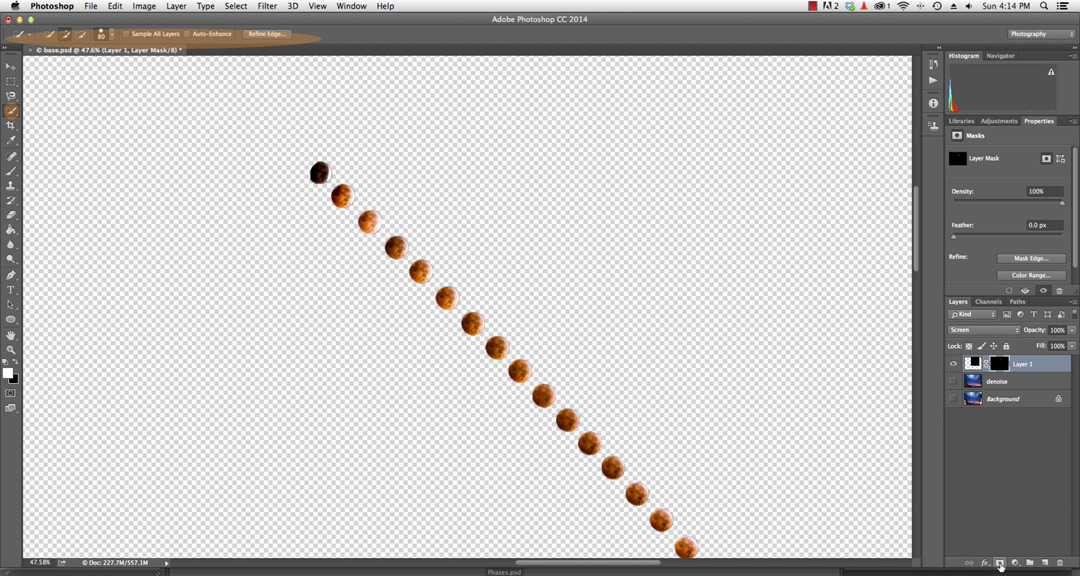
Switch the foreground layers back on, and boom! Your Moons are back and all that nasty red sky has gone.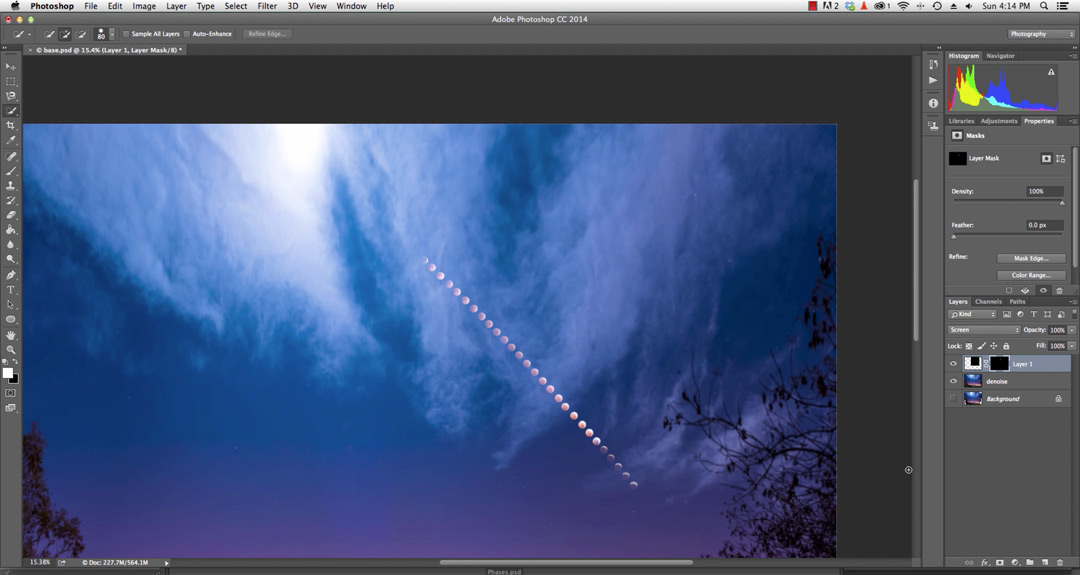
Now, because we were lazy we didn’t select all the Moons we’re missing some. So switch to the Brush tool and just paint white on the black layer mask where you think the Moons are, and watch the magic as they reappear.

And we’re done. Lunar Eclipse over a Temple. Easy.
That was a lot of reading. You should have watched the video.
Thank you for stopping by. Please considering supporting our efforts by buying the print here.
Come on, talk to us!